Appearance
Files & the page viewer
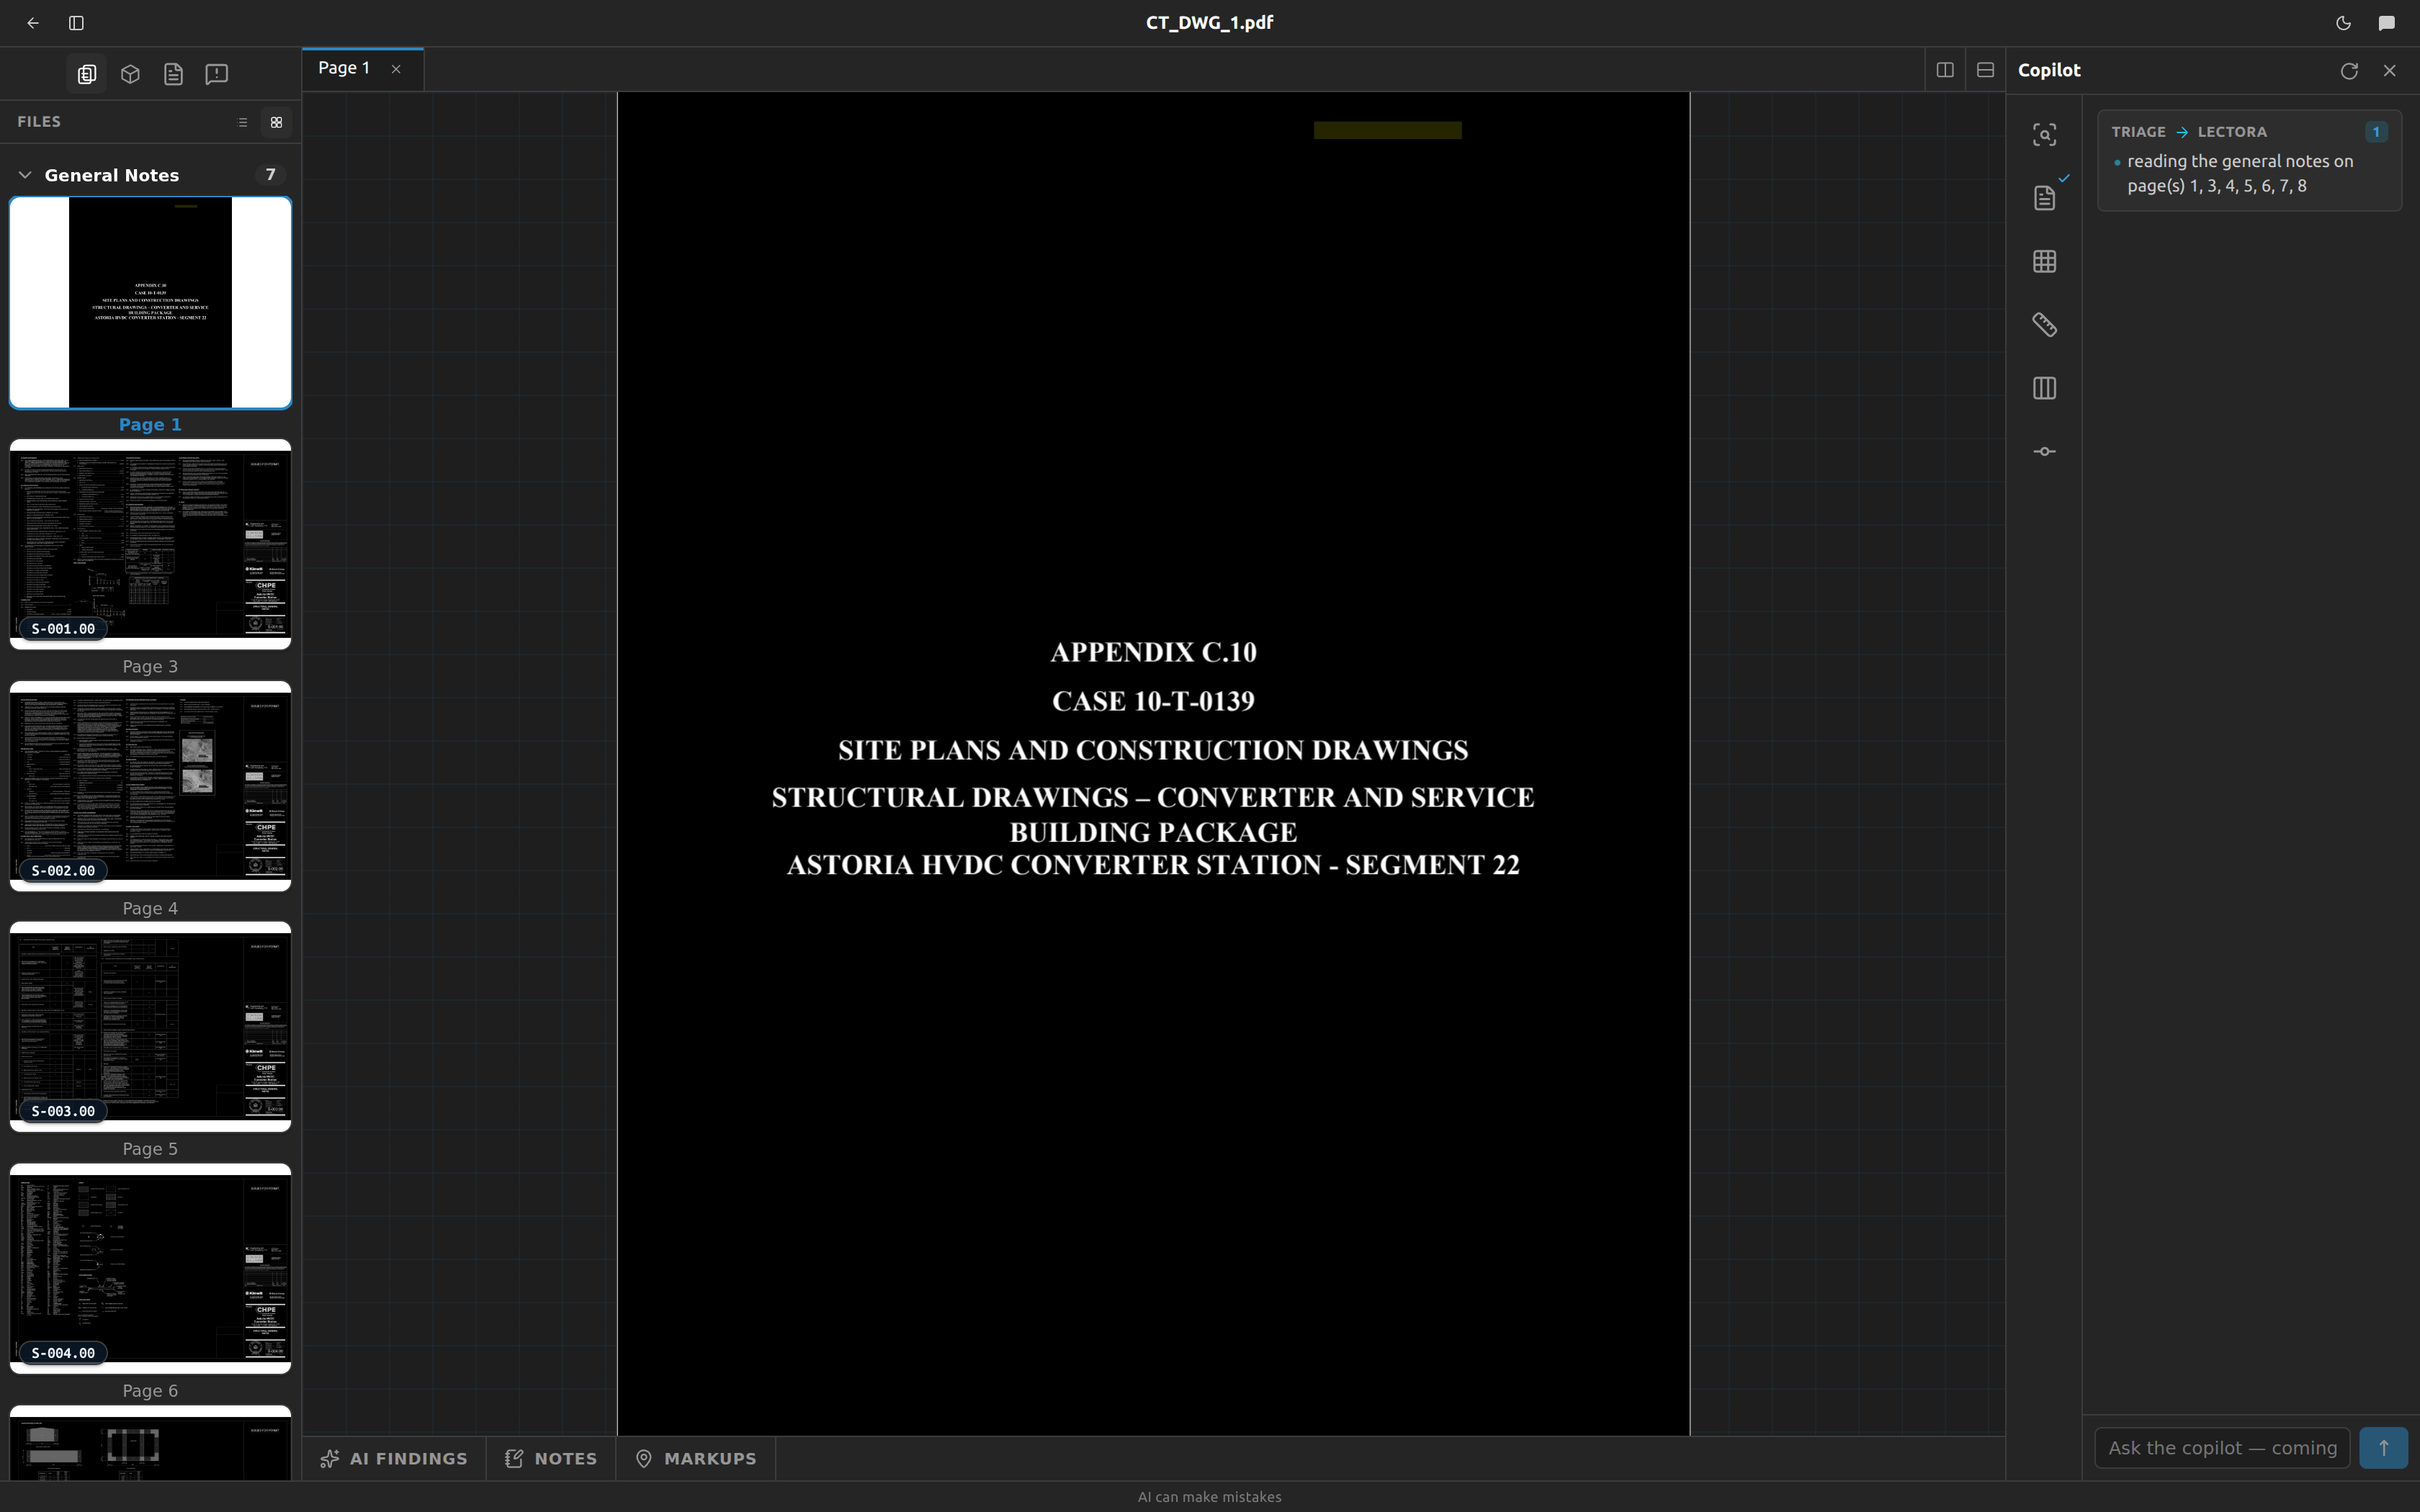
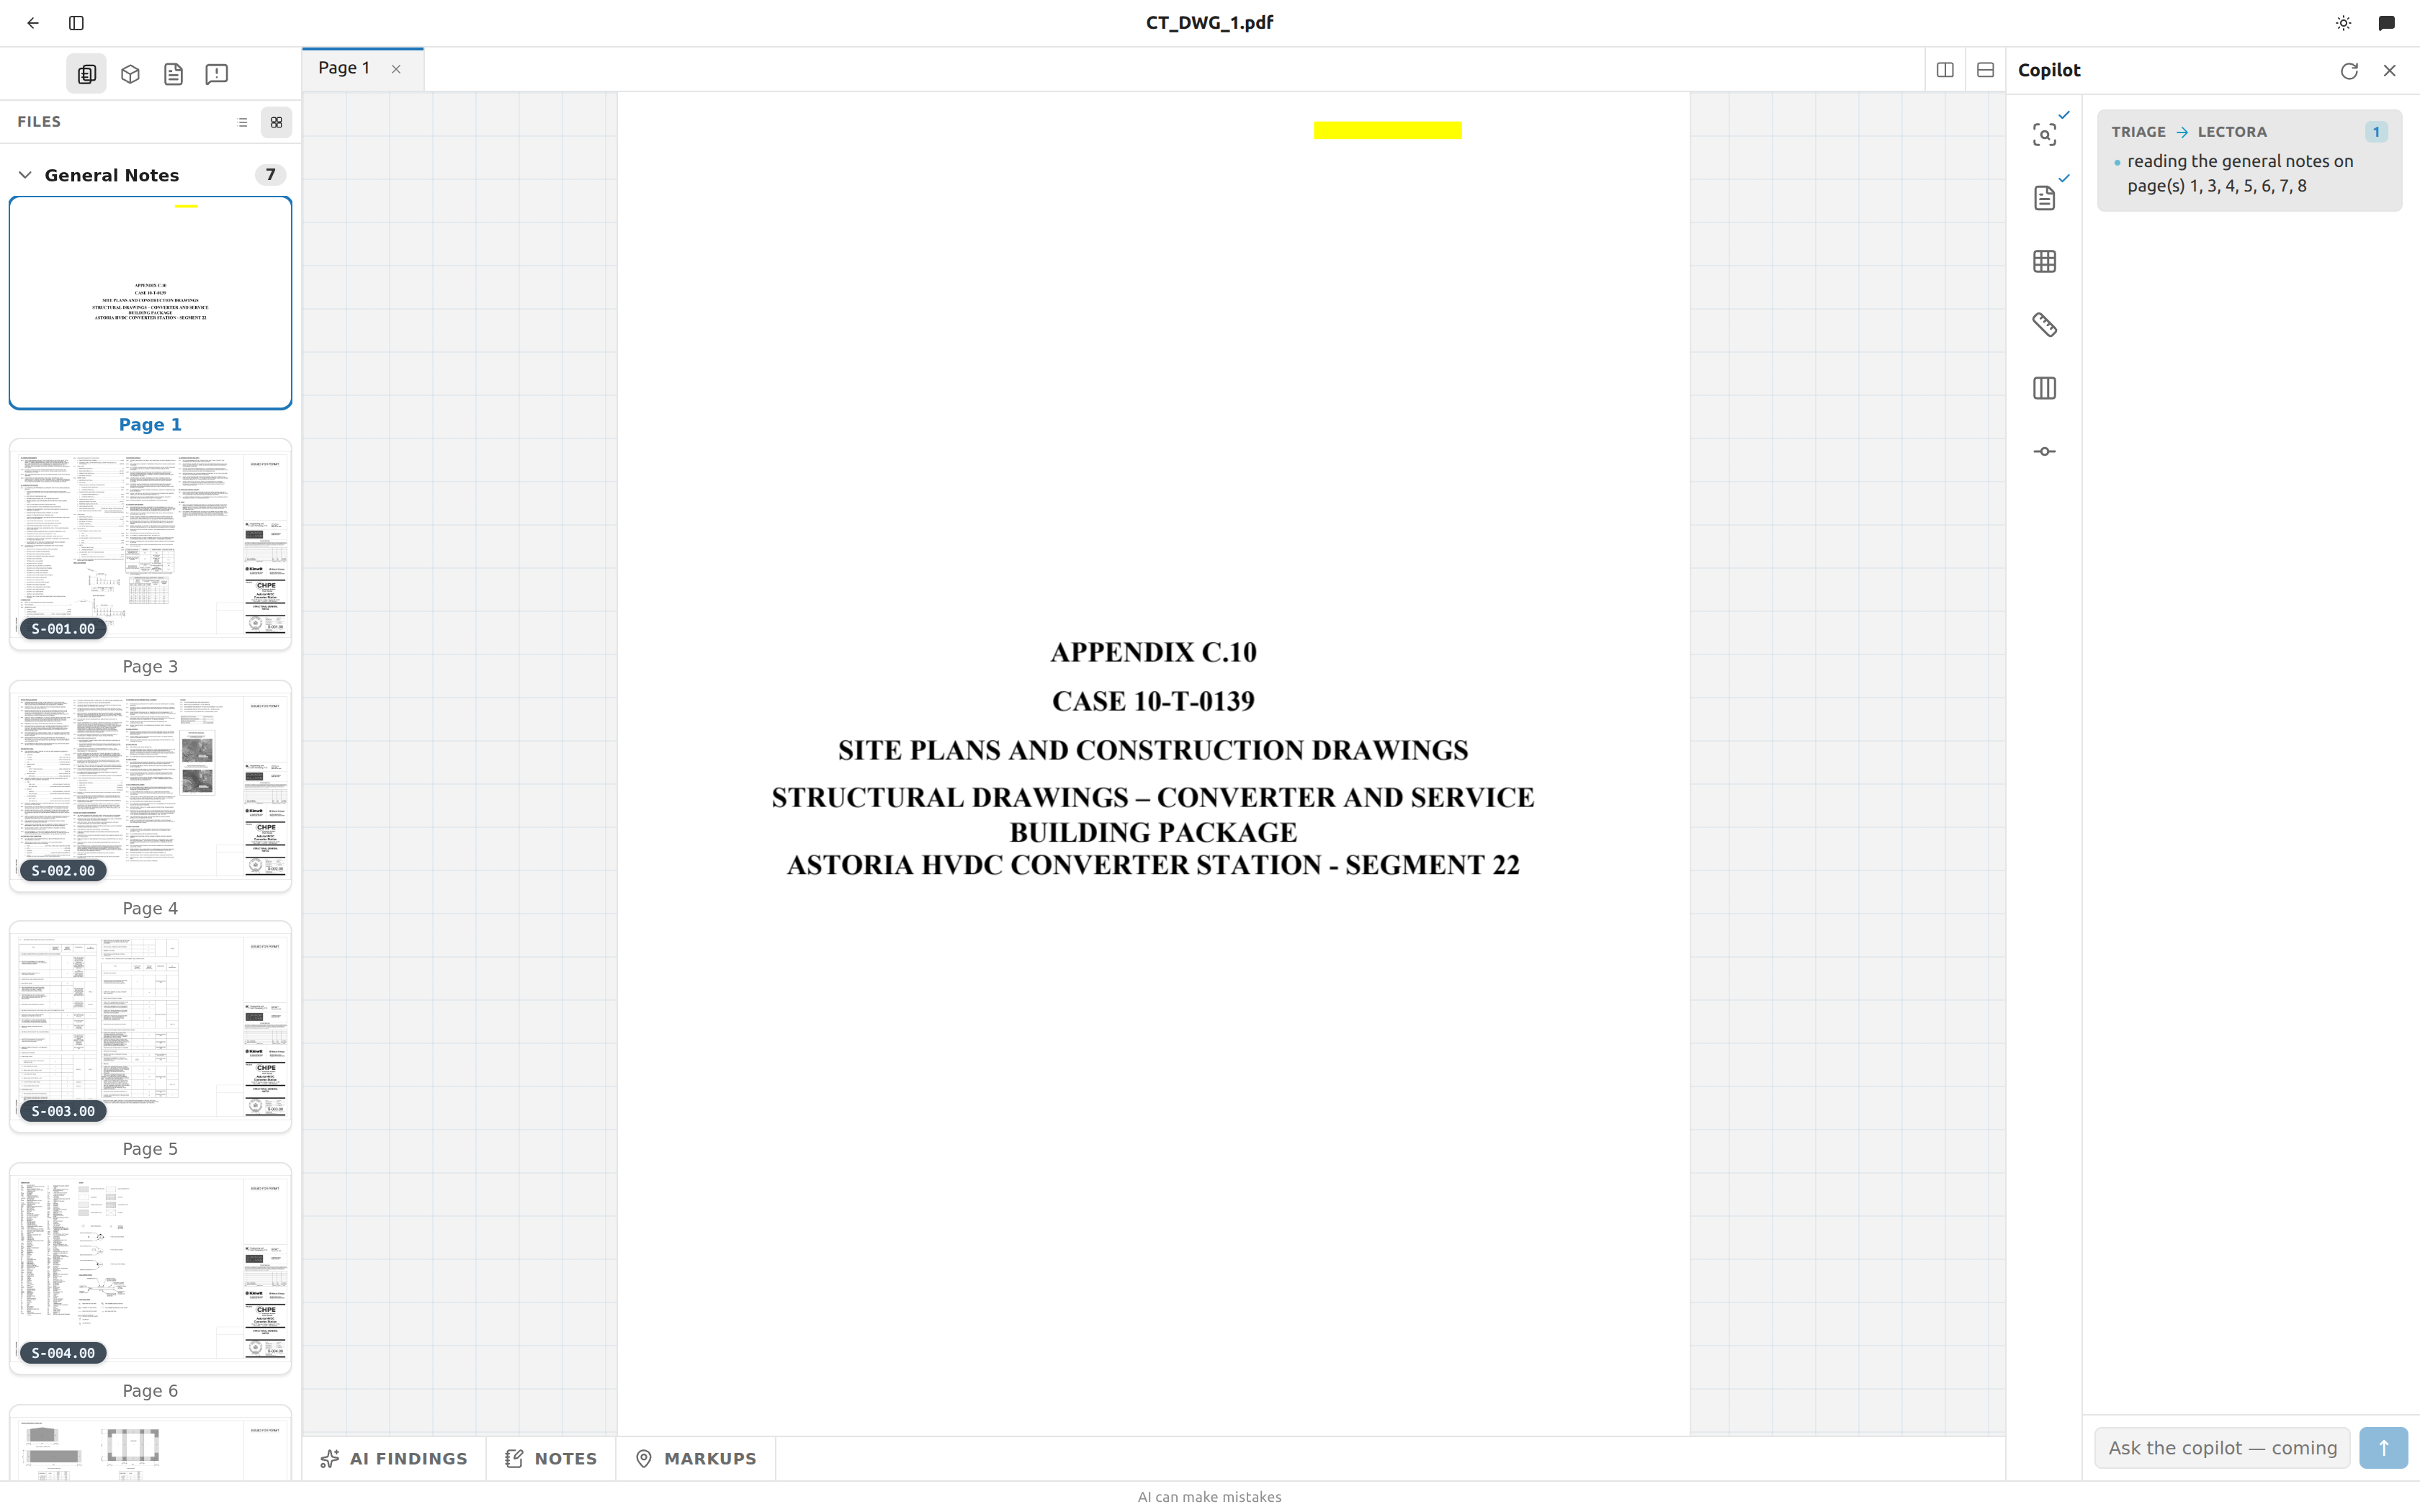
The Files panel is the table of contents for your drawing set. The page viewer is where you read one sheet, mark it up, and outline the part of it you want to build from. Between them they cover the first part of every project: finding the steel, correcting what the copilot read, and getting a scene started.
Open the Files panel
- Click the sheet-stack icon in the left rail of the panel (tooltip Files).
- The panel header reads Files.
⌘/Ctrl + B hides and shows the whole panel. Drag its right edge to resize it — that width is remembered.
Search the whole set
A search box sits at the top of the Files panel, above the sheets. Type into it and the sheet list is replaced by what it found — across every sheet, not just the one you are looking at. The same search also runs from ⌘/Ctrl + P, which is quicker to reach; this panel is where you work through a long answer.
It searches five things at once:
| What | A hit looks like | Clicking it |
|---|---|---|
| The drawing's own text | The string as it appears on the sheet | Opens that sheet and zooms to the string |
| Sheet IDs and titles | S-201 · FOUNDATION PLAN, tagged sheet | Opens that sheet |
| RFIs | The RFI's message, tagged RFI | Opens the scene that raised it |
| Your markups | The comment you typed, tagged markup | Opens the sheet it is on |
| Your notes | The note text, tagged note | Opens the sheet it is on |
| Members you have placed | W12X40 · {scene name}, tagged column / beam / brace | Opens that scene |
Sheet, RFI, markup, note and member matches are listed first — there are usually few of them and they are usually the answer. Drawing text follows, grouped by sheet with a count, and each group folds shut with the caret.
The box has the same three switches as the scene editor's (Aa, ab|, .*) and starts empty and literal, so 25'-0" finds 25'-0".
Long result lists
A term like 1 or PLAN can match thousands of strings, so the list shows a first helping and tells you what is behind it: {n} more on this sheet, {n} more sheets with matches, and a similar line for the sheet/RFI/markup/note/member rows. The count at the top always counts everything found, not what is on screen — so a list that has been shortened never reads as a complete one.
A scanned sheet cannot be searched
Fablnx reads the text a PDF carries; it does not read pictures of text. If any sheet in your set is a scan, the panel says so — {n} sheets have no searchable text and cannot be searched — so an empty result is never mistaken for "it isn't in this set".
It works offline, and it doesn't slow down as you type
The set's text is downloaded once, the first time you use the search, and then kept. It is small — the text of a 68-sheet set is a fraction of a single sheet's linework — so every keystroke after that is answered on your own machine with nothing to wait for. A project you have made available offline takes its search along with its sheets.
Switch between list and thumbnails
Two buttons sit at the right of the panel header, and only while the Files view is selected:
| Button | Tooltip | What you get |
|---|---|---|
| Three lines | List | A compact row per page: the sheet ID (or Page 12 when there is none), plus a classification pill. |
| Four squares | Thumbnails | A picture of each sheet, with the sheet ID as a badge and Page 12 as the caption. |
This choice is not remembered
Every project opens in Thumbnails, and it resets to Thumbnails whenever you reload or navigate away. There is no shortcut for it.
Why the thumbnail doesn't repeat the classification
A tile shows only the sheet ID and the page number. The group header above it already says what kind of page it is, so the tile doesn't say it twice.
Find a page in the classification groups
Once the copilot has identified the pages, the panel groups them under headers, always in this order:
| Group header | What is in it |
|---|---|
| General Notes | Written notes and specification sheets. |
| Steel Structures | The structural steel drawings you build from. |
| Excluded | Pages from other disciplines, or otherwise not relevant. |
| Not Yet Classified | Pages the copilot has not produced a result for yet. |
- A group only appears if it has at least one page in it.
- Click a header (or its chevron) to collapse and expand the group. The page count is on the right of the header.
- Collapsing a group in list mode collapses it in thumbnail mode too.
Collapsed groups do not stay collapsed
Collapse state is lost on reload, the same way the list/thumbnail choice is.
Two spellings of the same names
Group headers are Title Case — Steel Structures, Excluded. The pill on a list row and the dropdown in the bottom panel use sentence case — Steel structures, Excluded. They mean the same thing. An excluded page whose discipline was read shows its discipline on the pill too, for example Excluded · A.
Not Yet Classified is not a verdict
The first three groups are decisions the copilot made. Not Yet Classified is the absence of one — the page is waiting, or the run did not finish. That is why you cannot choose it from the dropdown: only the copilot puts a page there, by not having reached it yet. If pages stay there after a run, the run failed and the copilot panel says so.
While the copilot is still identifying pages
A banner sits above the list while triage is running:
- Identifying pages… before anything is identified.
- Identifying pages · 24 so far once pages start landing.
Before any page is identified
Until the first result arrives, the panel is one flat list of every page in PDF order, with no group headers. Rows and tiles are there immediately; the images fill in as they render.
Open a page
- Click a row or tile to open it in the active editor group.
- Drag a row or tile onto the editor to open it in a split.
- Right-click for the menu below.
The file right-click menu, in order:
| Item | What it does |
|---|---|
| Open | Opens in the active group. |
| Open to the Side | Opens in a group to the right. |
| Open at Bottom | Opens in a group below. |
| Copy page number | Copies the page number as you see it, counting from 1. |
| Mark as Steel structure | Re-files the page under Steel Structures. |
| Mark as General notes | Re-files the page under General Notes. |
| Mark as Excluded | Re-files the page under Excluded. |
Nothing in this menu is ever greyed out. Close it with Esc, another right-click, or a click elsewhere.
Re-classify a page
The three Mark as… items are the only way to re-file a page from the file list.
- Right-click the page in the Files panel.
- Choose Mark as Steel structure, Mark as General notes, or Mark as Excluded.
- The page moves group immediately — no save, no refresh.
Two things this menu cannot do:
- There is no Mark as Not yet classified. Those are the three buckets triage decides between, and "nobody has looked at this yet" is not something you choose.
- The three items do not appear at all on a Not Yet Classified page.
A Not Yet Classified page cannot be re-filed yet
If the copilot has not produced a result for a page, its right-click menu stops at Copy page number, and opening the page shows no bottom panel either. There is nowhere to set its classification until triage produces a row for it. You can still open, read, zoom and mark up the page in the meantime — you just cannot file it.
Read a sheet in the page viewer
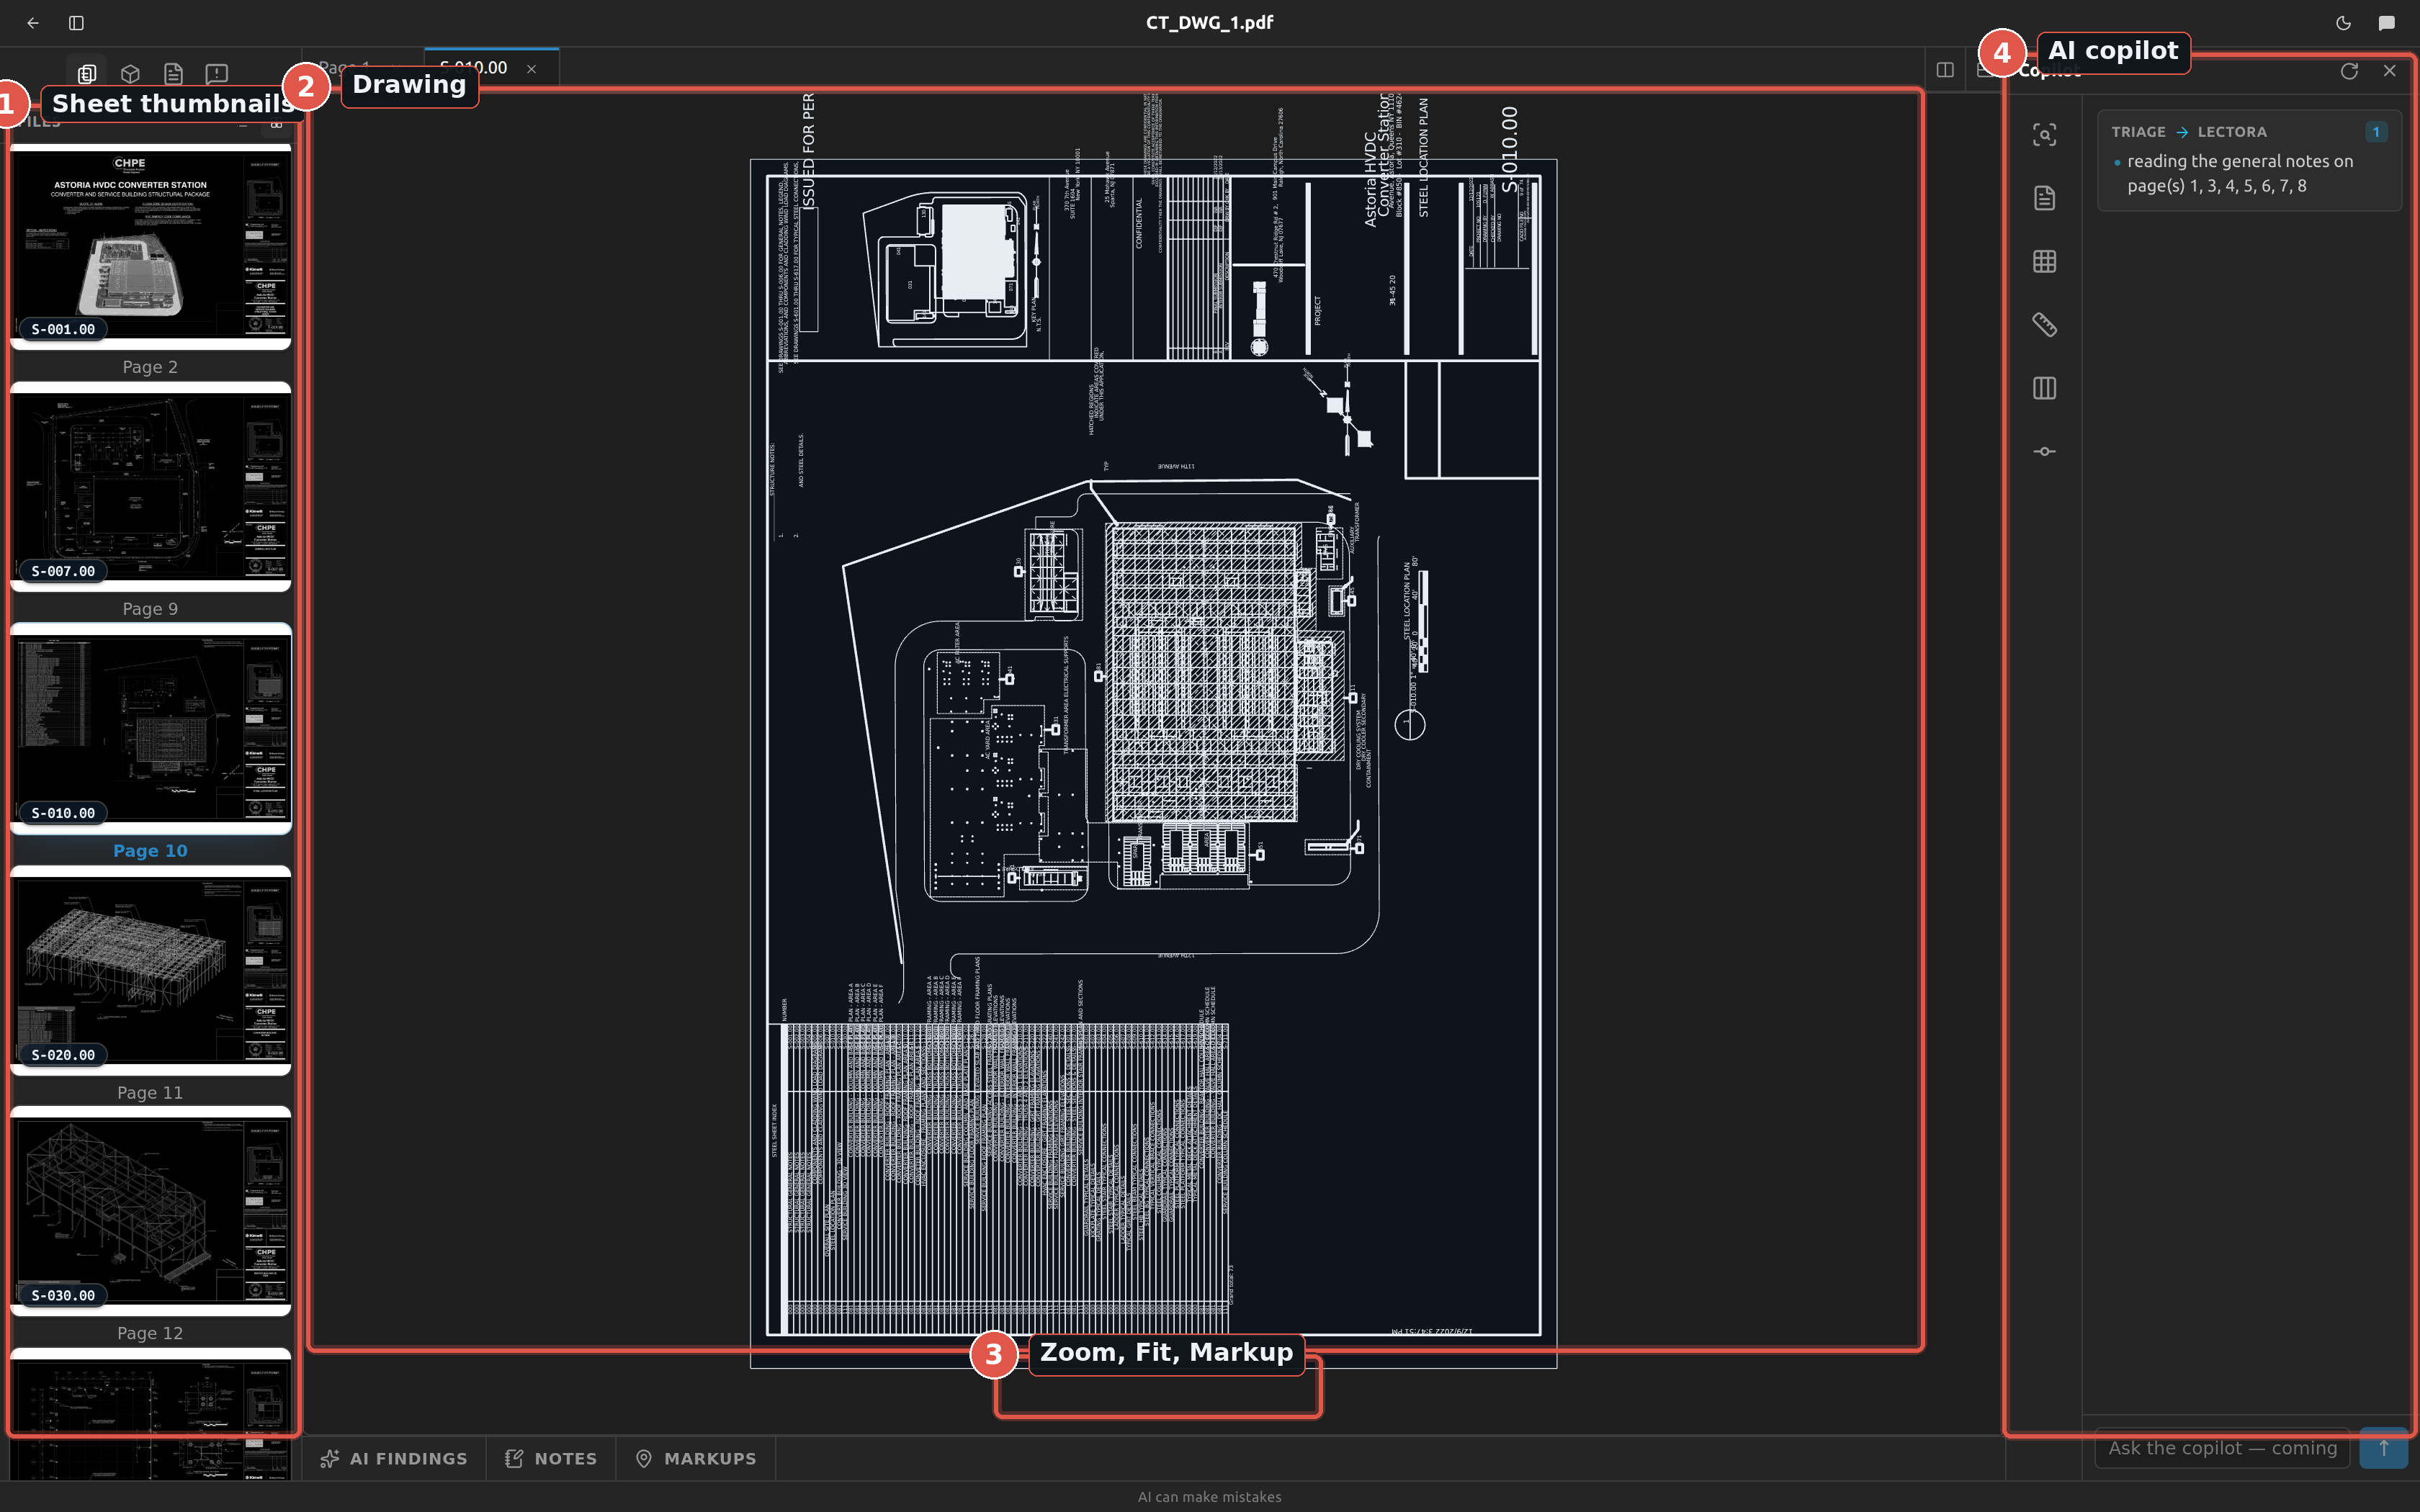
Opening a page gives you the sheet, a floating zoom bar, and a button for switching between the two renderings.
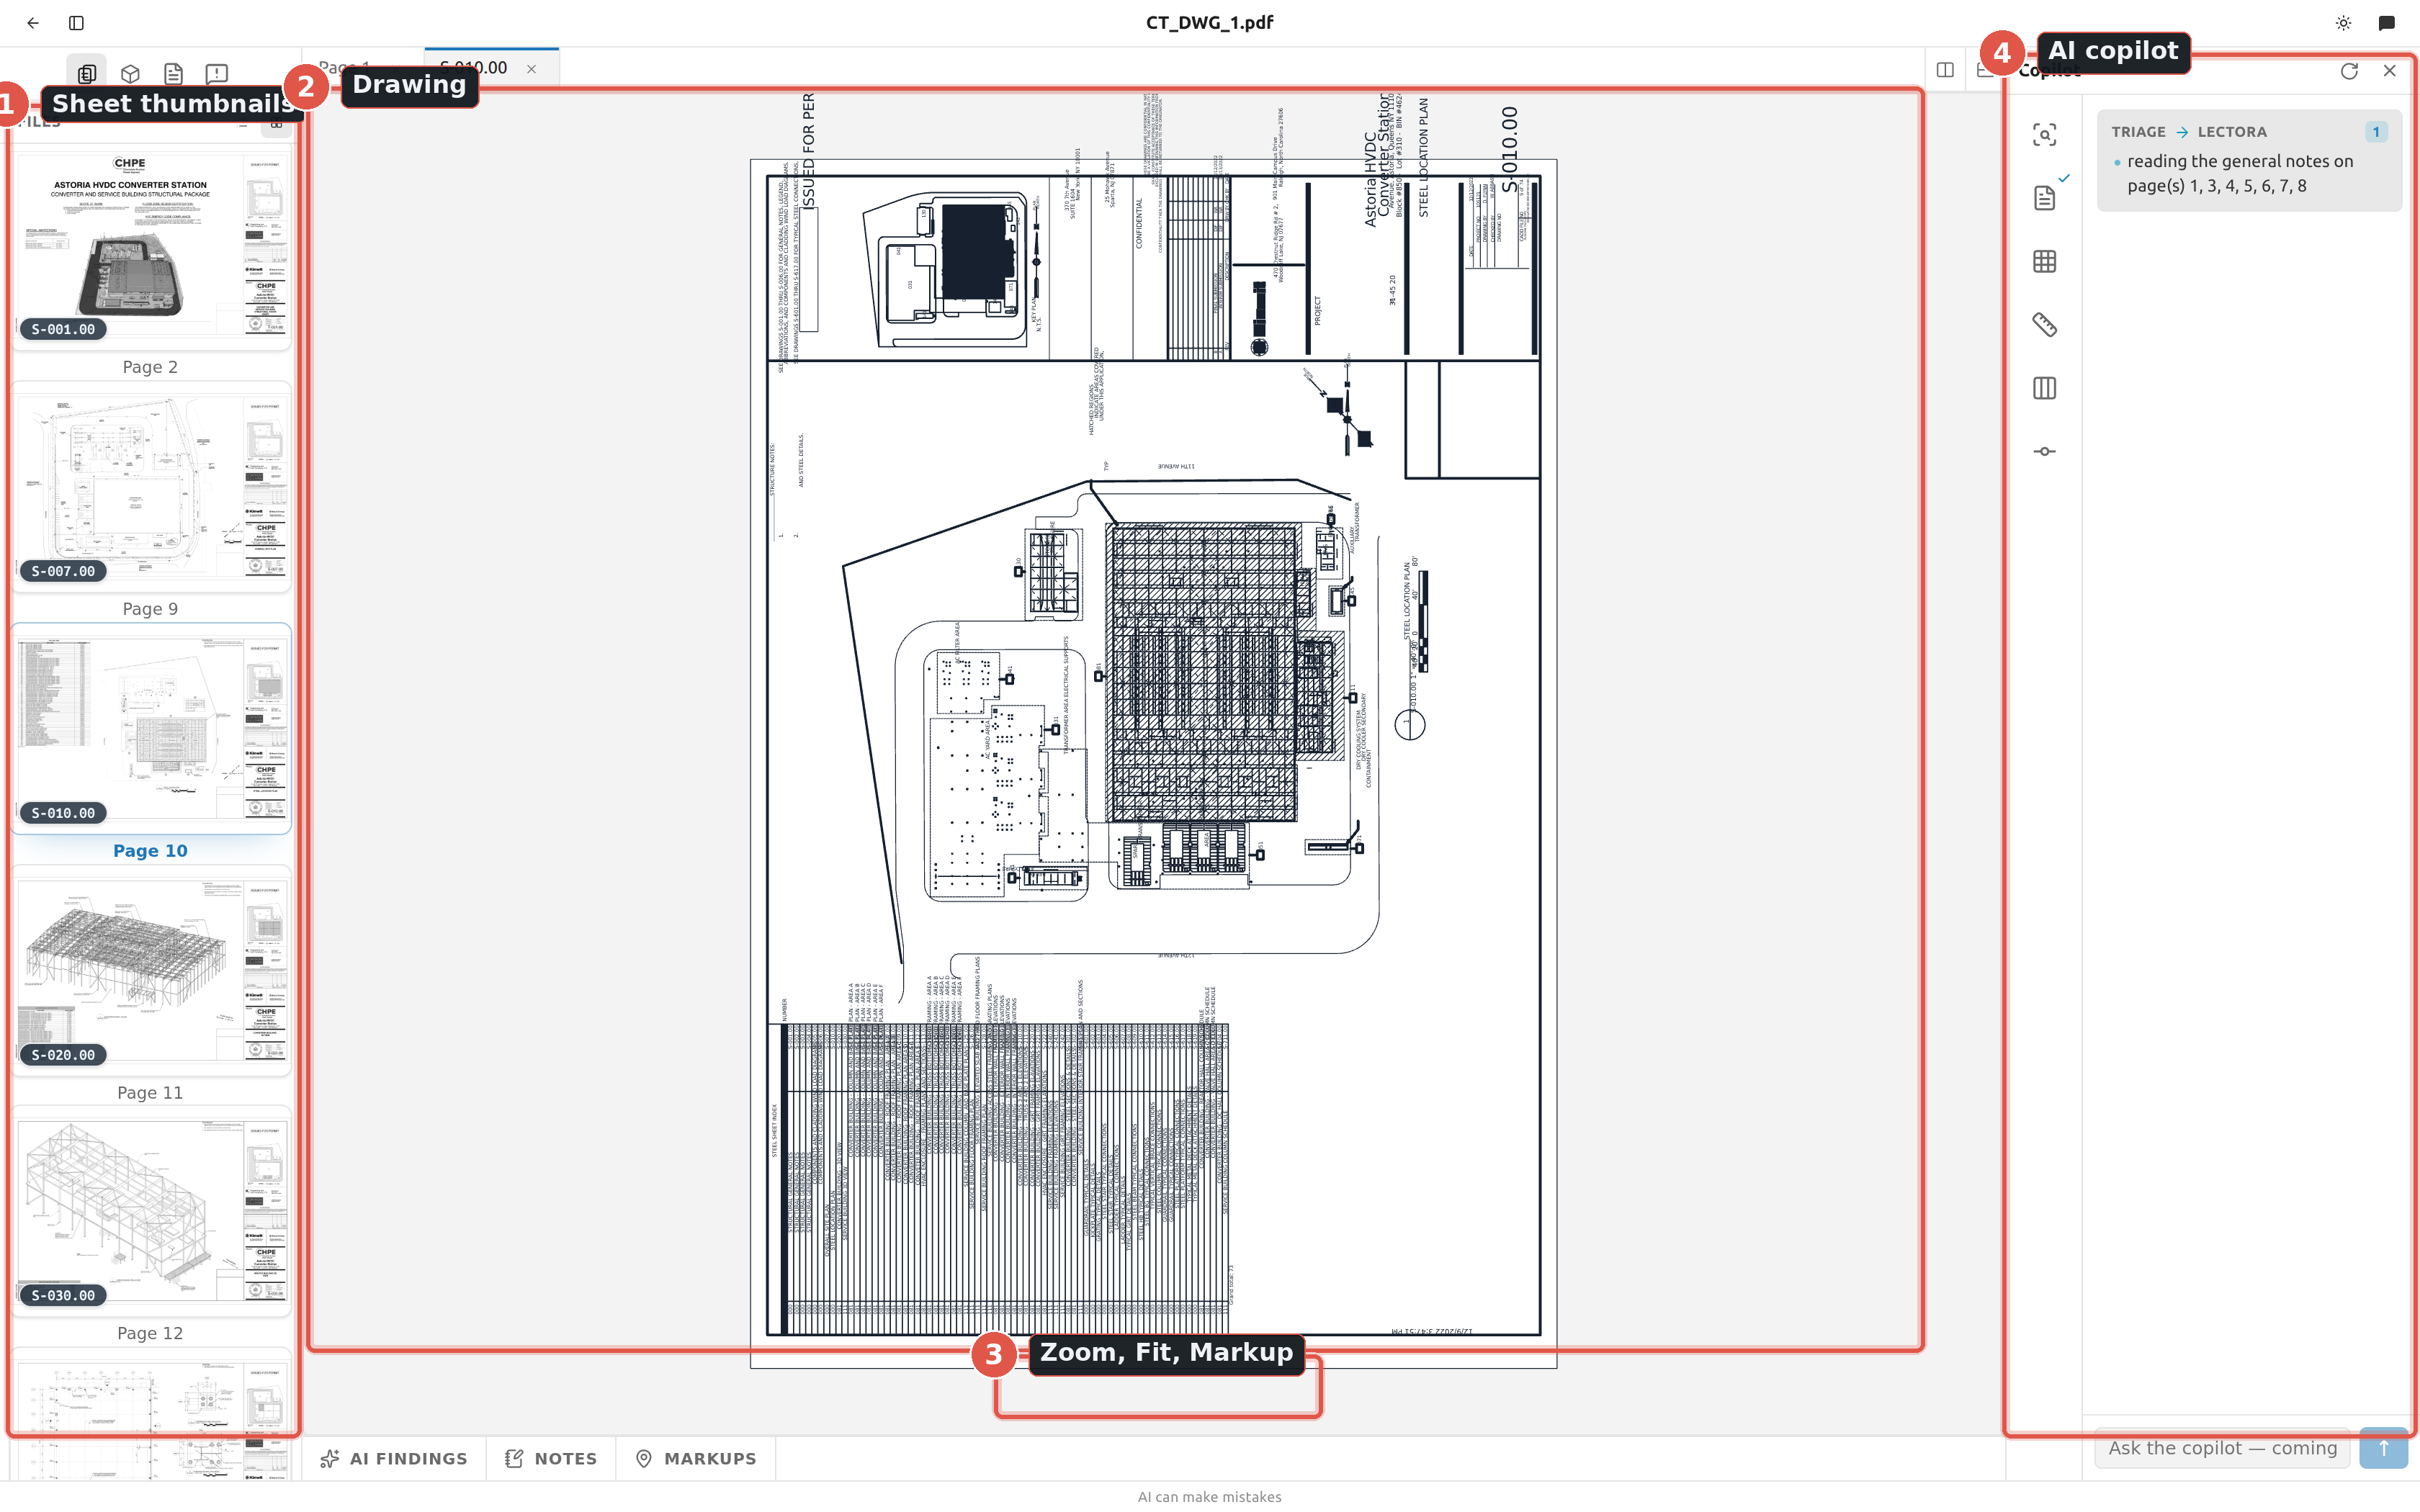
Zoom, pan and fit
The zoom bar is a floating pill at the bottom of the sheet. It is invisible until you move the pointer over the drawing (or tab into one of its buttons).
| Control | Tooltip | Shortcut |
|---|---|---|
| Minus | Zoom out | − |
| The percentage | — | — |
| Plus | Zoom in | + |
| Frame | Fit page | F |
| Pin | Markup — click to pin, drag for an area (Cancel markup while it is on) | M |
Gestures on both renderings:
| Gesture | Result |
|---|---|
| Wheel or trackpad scroll | Zooms around the pointer. |
| Two-finger pinch | Zooms. |
| Drag on empty space | Pans. Panning is off while the markup tool is armed. |
| Double-click | Scanned sheet: resets the view. Vector geometry: fits the page. |
The view re-fits itself whenever the pane changes size — dragging the Files panel, resizing the window, splitting the editor, opening the bottom panel.
100% is the fitted view on both renderings, so the number means the same thing whichever one you are looking at, and switching between them does not change it. F and the Fit page button also do the same thing on both.
When the keys do nothing
F, + and − are ignored while you are typing in a text box, and they do nothing until the pane actually has a drawing in it. M and Esc only act on the focused pane. See keyboard shortcuts.
Switch between the scan and the vector geometry
Every page can be read two ways: as the scanned sheet (the picture of the page), or as the vector geometry Fablnx reads out of the PDF. One square button on the zoom bar switches between them.
Which way a page opens, and whether the button is there at all, follows what Fablnx has made of the page:
| Fablnx has decided | Opens as | Button |
|---|---|---|
| Nothing yet | Whichever suits the page — vector linework opens as geometry | Shown |
| It is a steel drawing | The vector geometry | Shown |
| It is something else — a schedule, notes, a cover | The scanned sheet | Not shown |
A page that is not a drawing has no linework worth tracing, so the choice is withdrawn rather than offered and left to disappoint. If that judgement is wrong, change the page's kind in the Pages panel and the button comes back with it.
| Button label | Means you are looking at | Click to get |
|---|---|---|
| Show the scanned sheet | The vector geometry | The scan |
| Show the vector geometry | The scan | The vector geometry |
The button names where you are going, not where you are
When the vector geometry is showing, the button reads Show the scanned sheet. Read it as an instruction, not a status.
How a page opens the first time:
- It tries the vector geometry first.
- If the page turns out to have no linework in it — a true scan — it falls back to the scanned sheet on its own.
- From then on, whatever you last chose for that page is remembered, per page and per project, until you change it.
Classification has nothing to do with it. Any page can be opened either way, including one the copilot has not sorted.
The vector geometry is read out of the PDF while your project is being set up, not when you first click. That reading is the slow part — seconds per sheet, and far more on a dense one — so Fablnx does it for every page in the background, alongside the copilot's first pass, rather than making you wait for it the first time you open a sheet.
If you get to a sheet before that finishes, the vector view says Reading the vectors out of the PDF… and shows the drawing as soon as it is ready. You do not have to do anything, and you do not have to come back — it is a wait, not an error.
If you pin the vector view on a scanned page
Once you have clicked the toggle, your choice wins over the automatic fallback. Pin vector on a page that has no linework and it will show Couldn't display the converted drawing. every time you open it. Click the toggle back to the scan to fix it.
Mark up a drawing
There is one markup tool. What you do with it decides what you get.
- Click the pin button on the zoom bar, or press M. The cursor becomes a crosshair.
- Click for a pin, or drag for an area box.
- The comment popover opens. Type your comment.
- Click Save, or press ⌘/Ctrl + ↵.
The tool disarms itself after one markup. Right-clicking the drawing and choosing Add markup here always drops a pin, whether or not the tool is armed.
Each markup gets a number badge, one higher than the highest already on the page.
A markup the copilot left carries a Copilot badge in the Markups tab and in its popover. You can edit or delete it like your own; once you change its comment it is yours and the badge goes.
| Task | How |
|---|---|
| Edit a comment | Click the markup, or edit it in the Markups tab of the bottom panel. |
| Delete one | Delete in the popover, or the trash button on its row in the Markups tab. |
| Cancel the tool | Press Esc or click the pin button again. |
Deleting is immediate — no confirmation and no undo.
Esc does not discard a markup you just placed
The markup is created the moment you click or drag, before you type anything. Pressing Esc or clicking outside the popover only closes the editor and leaves an empty, numbered markup on the drawing. To get rid of it, reopen it and click Delete, or delete its row in the Markups tab.
Markups belong to the page, not to the rendering
A pin dropped on the scanned sheet is in the same physical spot on the vector geometry, and the other way round. Switching renderings never loses a markup.
Clicking a markup on the vector geometry
On the scan, clicking anywhere inside an area box opens its comment. On the vector geometry you have to click on the box's border — the inside is left clickable so you can still reach the linework under it.
Outline a region
A region is an outline you draw on the vector geometry around one part of the sheet — a single framing plan, say. It is what a scene is built from.
- Open the page as vector geometry. Existing regions are already there, as coloured outlines with a handle on every corner — there is no mode to turn on.
- Right-click an empty part of the sheet and choose Create region here. A rectangle appears at the pointer.
- Shape it (below), then right-click and choose Save regions.
Fablnx proposes regions for you: every page is segmented in the background as soon as it is uploaded, whatever the page turns out to be, so the outlines are waiting when you open it. If it found nothing, the page simply has no outlines on it and you draw your own.
A very dense sheet gets no proposed regions, and says nothing about it
Segmenting is capped at 50,000 lines per page. A sheet with more linework than that produces no regions at all — and the app gives you no message, no warning and no way to force it. An empty region list on a heavy sheet is not a failure you can retry; outline the region you want by hand with Create region here and carry on as normal.
Edit a region
| Task | How |
|---|---|
| Reshape it | Drag a corner handle. |
| Move the whole region | Drag inside the outline. |
| Add a corner | Right-click on an edge → Add point here. |
| Remove a corner | Right-click the corner → Remove point, or double-click it, or select it and press Delete. |
| Delete the region | Right-click inside it → Delete region. |
| Keep your edits | Right-click → Save regions. |
| Throw your edits away | Right-click → Discard changes. |
Save regions and Discard changes are greyed out until you have made a change. Remove point does nothing on a three-cornered region — a region cannot have fewer than three corners.
A region under a scene cannot be deleted, and the failure is silent
If a scene was built from a region, the server refuses to delete it. Save regions appears to do nothing at all: the outline stays, Discard changes stays available, and no message is shown. If a delete will not stick, delete the scene that was built from that region first, then delete the region.
The same silence applies to any other save failure. If Save regions leaves the buttons enabled, the save did not go through.
Build a scene from a region
- In Regions mode, right-click inside the region you want.
- Choose Build scene from this region.
- The panel switches to Build and the new-scene dialog opens, already pointing at that page and region.
Fablnx saves the region first if it is new or edited — a scene refers to a saved region. If that save fails, nothing happens and no dialog opens; check the warning above.
From there, continue in the scene editor.
Re-cluster a page
Right-click the vector geometry and use the re-cluster item to ask Fablnx to segment the page again.
| Label | State |
|---|---|
| Re-cluster (needs 3+ steel pages) | Greyed out. The project has fewer than 3 pages in Steel Structures. |
| Re-cluster (reset to default) | Available. |
"Reset to default" does not reset
Re-clustering adds and updates regions. It never removes one. A region you drew by hand stays, and so does a proposed region the new run no longer finds. To get rid of a region, delete it yourself.
The 3-page threshold counts Steel Structures pages across the whole project, not anything about the page you are looking at.
Use the bottom page panel
A panel with three tabs sits along the bottom of the viewer. All three start collapsed: click a tab to open it, click the open tab to collapse it again, and drag its top edge to resize it.
| Tab | Badge |
|---|---|
| AI Findings | — |
| Notes | Number of notes |
| Markups | Number of markups |
The bottom panel only exists once a page is classified
This panel renders only for a page the copilot has produced a result for. On an Not Yet Classified page there is no tab strip at all — no AI Findings, no Notes, no Markups — and, as above, no Mark as… items in the file right-click menu either. Wait for triage to finish on that page.
AI Findings
What the copilot read for this sheet. All four fields are editable.
| Field | Control |
|---|---|
| Sheet ID | Text box, for example S-102.00. |
| Classification | Dropdown: Steel structures, General notes, Excluded. |
| Title | Text box. |
| Reason | Text box, placeholder Why this classification… |
- Correct whatever is wrong.
- Click Save changes.
Save changes is greyed out until one of the four fields differs from what is stored.
Do not leave an edit sitting unsaved
If the copilot updates this page while you are typing, your unsaved edits are replaced by the copilot's values. Click Save changes as soon as you have made a correction.
Notes
Free-text notes for the page.
- Type in the box at the bottom, placeholder Add a note for this page…
- Click Add note. It is greyed out while the box is empty.
Each existing note has a pencil and a trash button. Editing gives you a text box with Save and Cancel.
A note the copilot left carries a small Copilot badge in front of its text. You can edit or delete it like any other; once you change its text it is yours, and the badge goes.
Emptying a note deletes it
If you clear a note's text and click Save, the note is removed. There is no confirmation and no undo. Use Cancel if you only wanted to back out.
Markups
Every markup on the page, listed by its badge number, with its comment in an editable box and a trash button.
There is no Save button on this tab — a comment is saved as you type it. Notes and AI Findings both need an explicit save; markup comments do not.
Where to go next
With the steel pages sorted, let the copilot read them, or outline a region and go straight to the scene editor to start tracing. If a control is greyed out and you cannot see why, check troubleshooting.