Appearance
The workspace
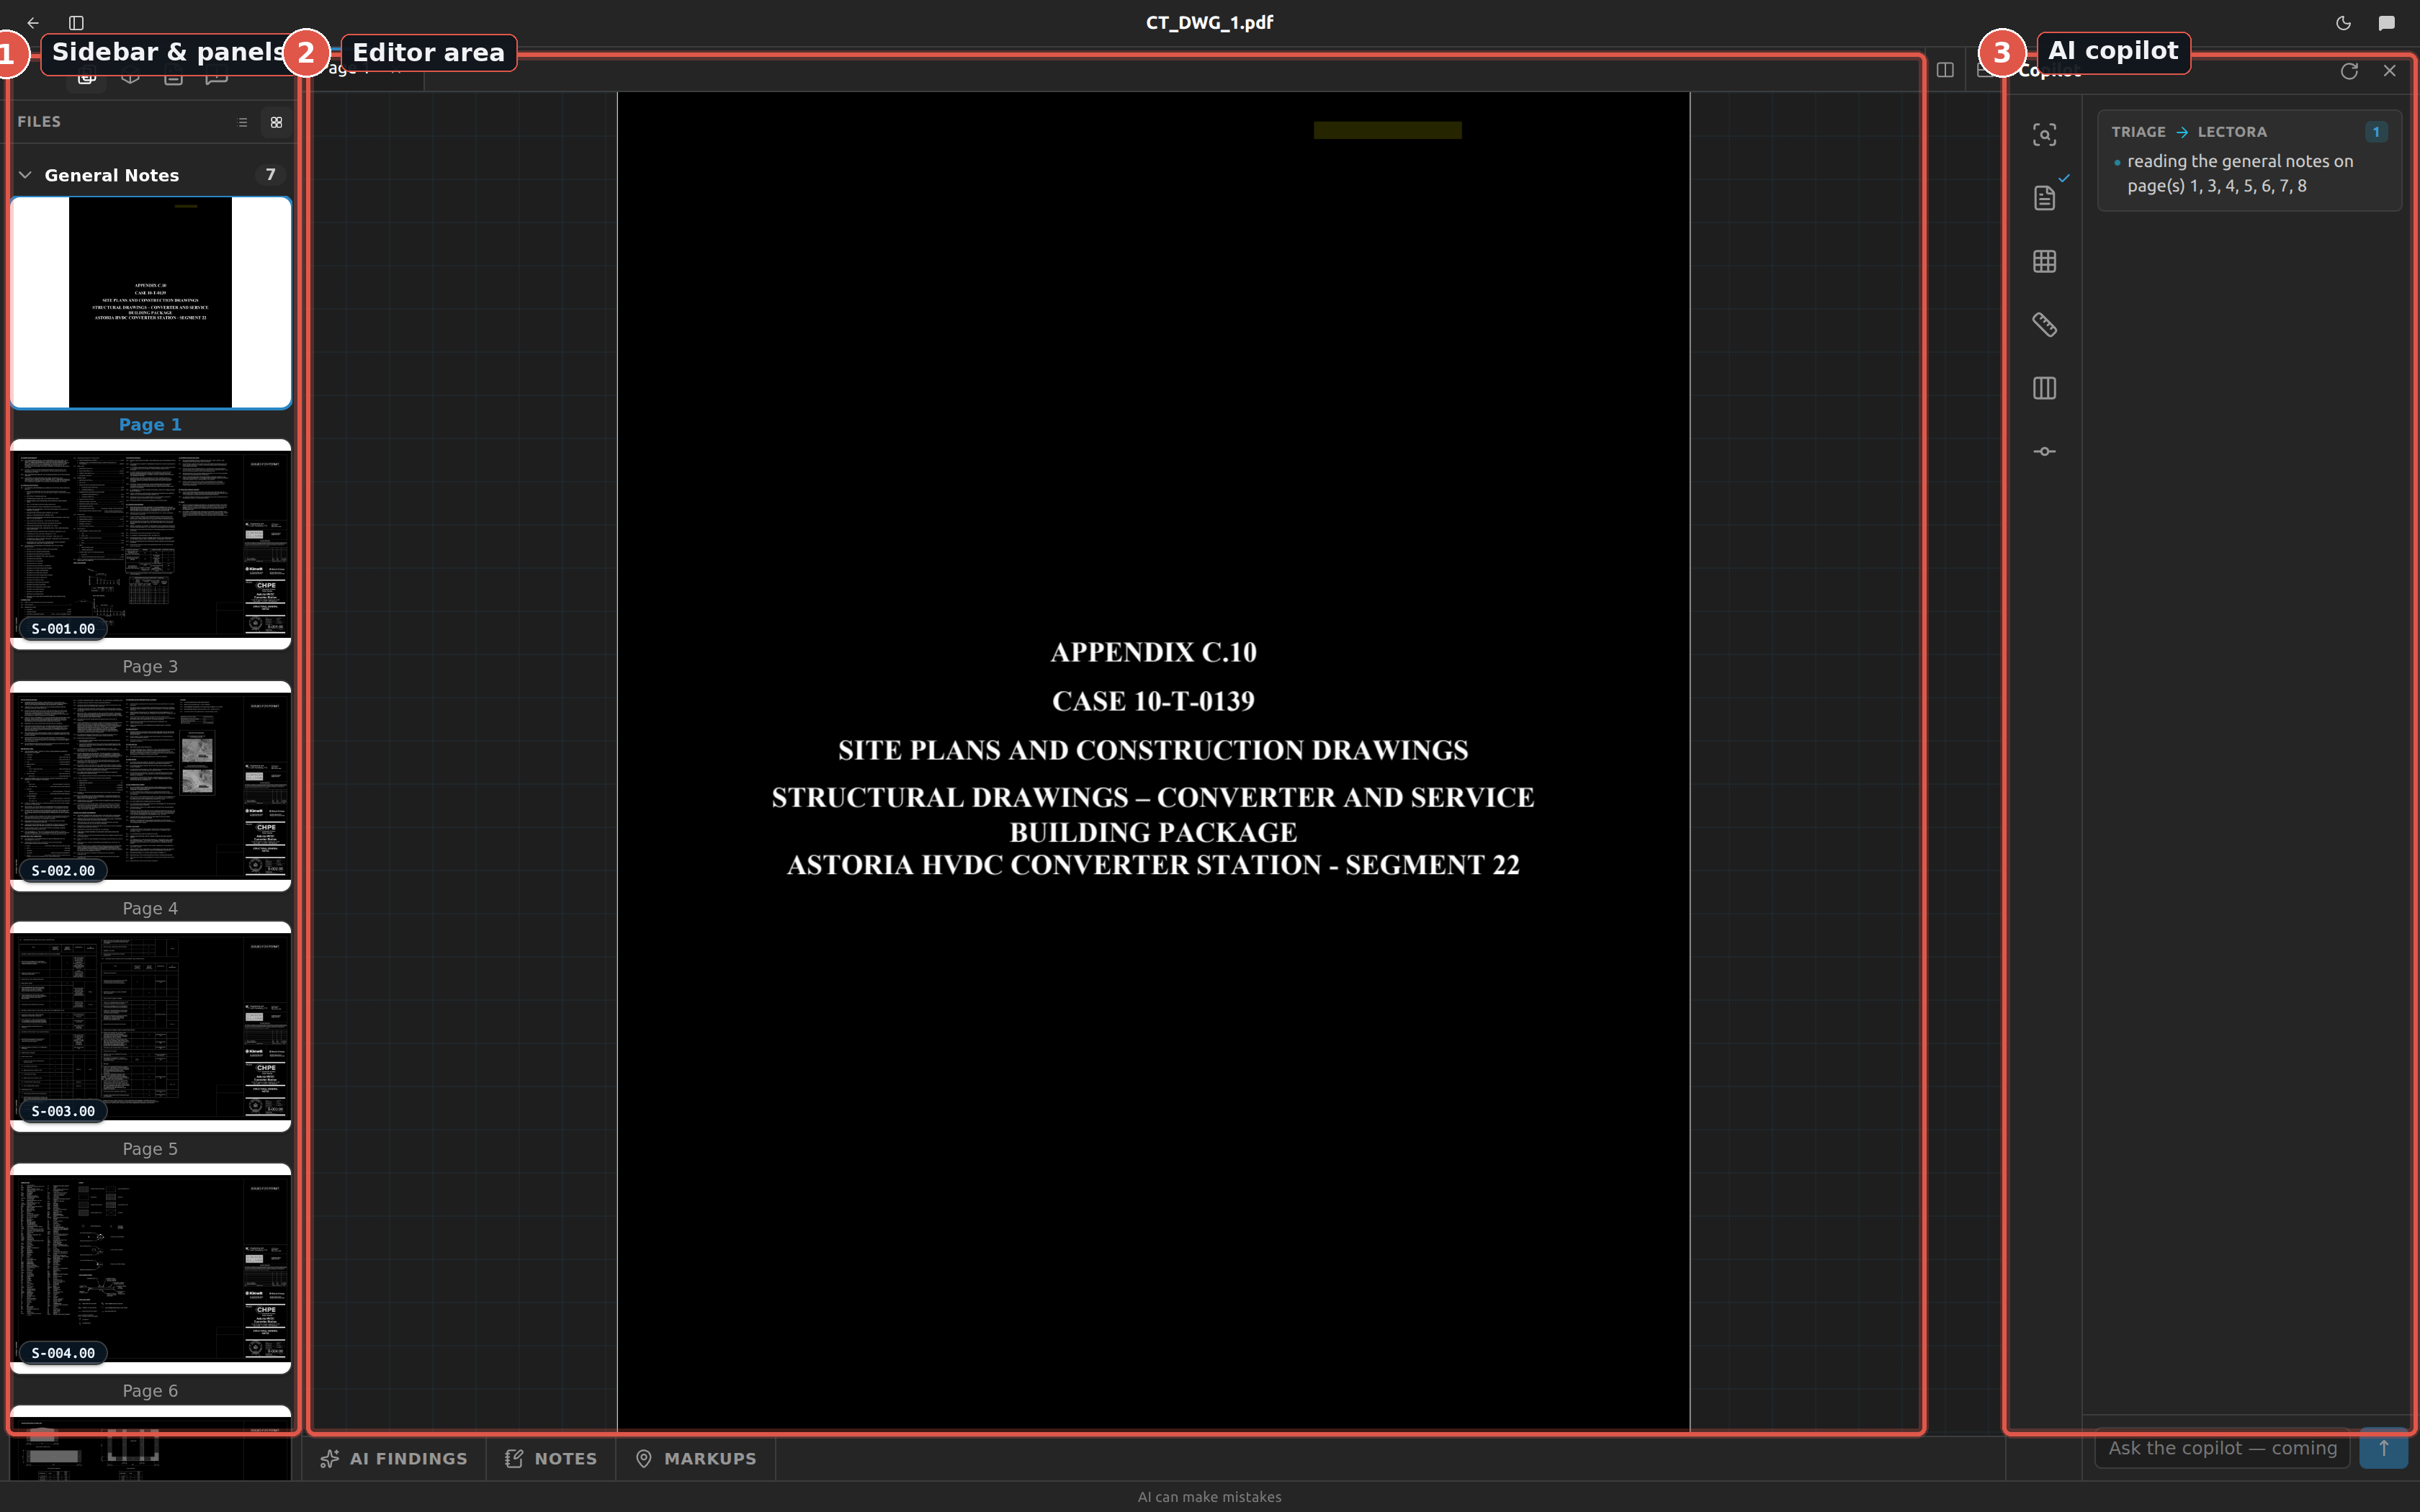
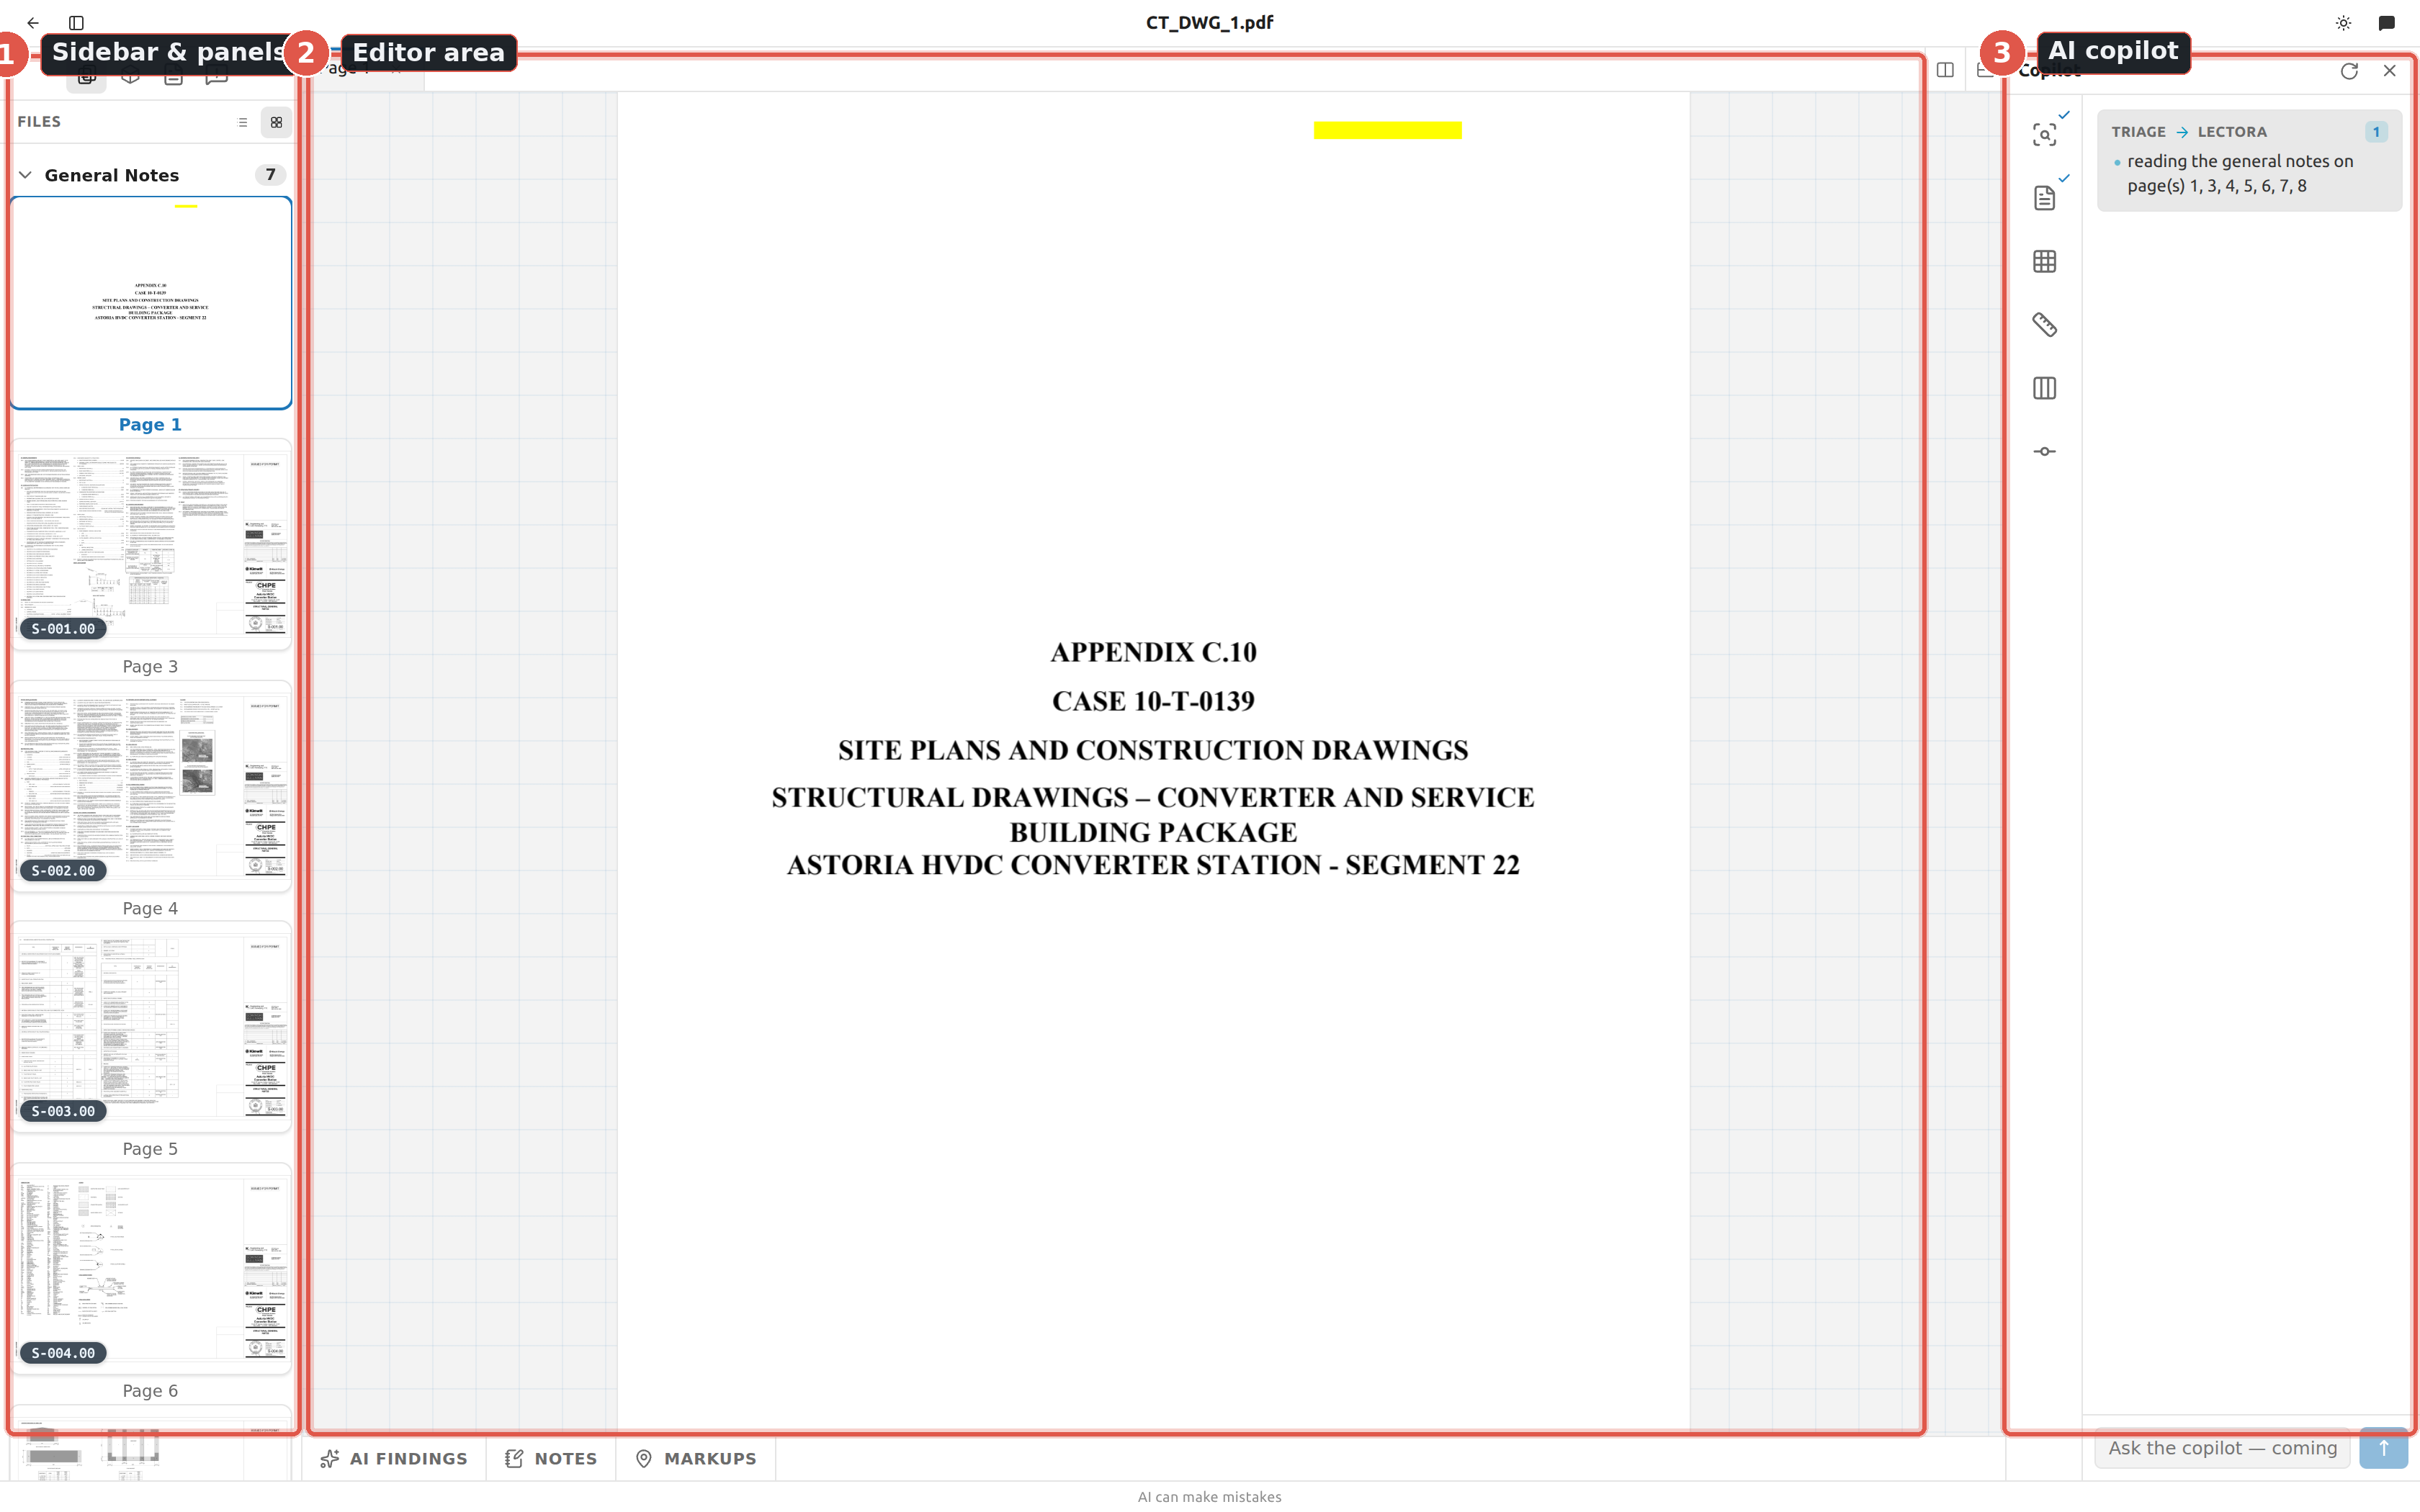
Opening a project drops you into the workspace — where you read the drawing set, trace scenes, and watch the model come together. It is laid out like a code editor: a top bar, a left sidebar, a tabbed editor area in the middle, and on the right the World panel and the AI copilot.
Read the top bar
Left to right:
| Control | Tooltip | Shortcut |
|---|---|---|
| Back arrow | Back to projects | — |
| Panel icon | Hide sidebar / Show sidebar | ⌘/Ctrl + B |
| Centre title | — | — |
| Sun / Moon | Light mode / Dark mode | — |
| Speech bubble | Hide copilot / Open copilot | ⌘/Ctrl + J |
| Question mark in circle | — (opens the Help menu) | — |
Each tooltip appears after hovering for about a third of a second.
The centre of the top bar shows the contract PDF's filename, not the project name. If the project was renamed on the server, the two will differ — the top bar keeps naming the file you uploaded.
The Help menu holds exactly two items: Start tutorial (with a badge showing its step count) and Documentation ↗, which opens this site in a new tab.
The theme button's icon and its tooltip disagree
The icon shows the theme you are in; the tooltip names the theme you will get. In dark mode you see a Moon and the tooltip reads Light mode. In light mode you see a Sun and the tooltip reads Dark mode. Trust the tooltip — it describes the click.
Where the copilot and the sidebar remember their state
Whether the sidebar and copilot are open is remembered across every project. Which sidebar panel you had open is remembered per project, so a project you have never opened starts on Files. Your tab layout — including splits — is saved per project and restored the next time you open it.
Move between the five sidebar panels
Click an icon in the strip down the sidebar's left edge. There is no keyboard shortcut for the individual panels — ⌘/Ctrl + B only shows or hides the whole sidebar.
| Icon | Panel | What's in it |
|---|---|---|
| Sheet stack | Files | Every page of the drawing set, sorted into groups as the copilot identifies them — and a search box over the whole set. |
| Model cube | Build | The scenes you are tracing, and + New scene. |
| Document | Design spec | The steel spec read out of the general notes. |
| Warning bubble | RFIs | Questions validation has raised against your scenes. |
| Layers | Structure | The building itself — its levels, its grids and the coordinated model. |
Drag the sidebar's right edge to resize it, between 180 px and 560 px wide. The copilot panel on the right resizes the same way, between 260 px and 620 px, by dragging its left edge.
Nothing here needs refreshing
Every panel is live. There is no Refresh button anywhere in the workspace, and its absence is deliberate — when the server changes something, the panel showing it updates itself.
Work with editor tabs
The middle of the workspace is a tabbed editor. A tab can hold a page, a scene, or one of the building's own views — Levels, Grids or Model.
- Open a page or scene by clicking it in the sidebar, or drag it into the editor.
- Reorder by dragging a tab along the strip. A caret shows where it will land; whether it drops before or after a tab depends on which side of that tab's midpoint your cursor is on.
- Close with the tab's ×, or by middle-clicking the tab.
- Switch with ⌘/Ctrl + 1–9 for the first nine tabs of the group you are in.
A page tab is labelled with its sheet id once the copilot has identified the page, and Page 1, Page 2… until then. A scene tab carries the scene's name.
The tab right-click menu
Right-click any tab for:
| Item | Disabled when |
|---|---|
| Close | — |
| Close Others | the group has fewer than 2 tabs |
| Close to the Right | the tab is already the last one |
| Close All | — |
| Split Right | — |
| Split Down | — |
A right-click near the screen edge can run off-screen
The menu opens at the cursor and does not flip to stay in view. Right-click a little further from the right or bottom edge if part of the menu is cut off.
Split the editor
To put a drawing and its scene side by side:
- Open the first tab.
- Click Split right or Split down in the tab strip — the two icons at its right-hand end, shown only when the group has an active tab. Or press ⌘/Ctrl + \ for right, ⌘/Ctrl + Shift + \ for down.
- Open the second page or scene into the new group.
You can also split by dragging. Start dragging a page from Files, a scene from Build, or a tab from any group, and three labelled drop zones appear over the pane you are hovering:
| Drop zone | Label | Result |
|---|---|---|
| Centre | Move here | Adds the tab to that group. |
| Right edge | Split right | Creates a new group beside it. |
| Bottom edge | Split down | Creates a new group below it. |
Drag the divider between two groups to resize them; neither side can go below 12% of the pair.
Move focus between groups with ⌘/Ctrl + K then → or ←.
What happens when a group empties
Close the last tab in a group — or drag it out — and the group disappears and the split closes up. Split proportions are not saved: they reset when you reopen the project, and whenever you add or remove a group in that split.
Jump anywhere — and search everything
- Press ⌘/Ctrl + P.
- Type. The box reads Go to a sheet or scene, or search the whole set…
- Move the highlight with ↑ / ↓, open with Enter, close with Esc or a click outside.
It answers two questions at once, in two sections.
Go to — what the sheet or scene is called:
| You can find | By typing |
|---|---|
| A scene | its name |
| A page | its 1-based page number, its sheet id, or its sheet title |
In the drawing set — what the sheets actually say. Under that heading come matches from the drawing's own text, your markups and notes, RFIs, and members you have placed. Pick a text match and it opens that sheet zoomed to the string. This is the same search the Files panel runs.
Scenes are listed above pages. Leave the box empty and it lists the whole set, so it works as a browser as well as a search. With nothing matching you get Nothing matches, on any sheet.
The palette shows a handful; the panel shows them all
⌘/Ctrl + P is for jumping, so it lists a few matches and then tells you how many more there are — {n} more in the drawing set — open the Files panel to see them all. The Files panel groups them by sheet, folds them, and pages through the rest. It also carries the Aa / ab| / .* switches; the palette always takes your term literally and ignores case.
Learn the keyboard shortcuts
Press ? anywhere inside a project to open the Keyboard shortcuts overlay. Close it with Esc or by clicking outside — there is no close button.
View
| Keys | Action |
|---|---|
| F | Fit page |
| + | Zoom in |
| − | Zoom out |
| ⌘/Ctrl + B | Toggle Files panel |
| ⌘/Ctrl + J | Toggle Copilot |
Editor
| Keys | Action |
|---|---|
| ⌘/Ctrl + \ | Split right |
| ⌘/Ctrl + Shift + \ | Split down |
| ⌘/Ctrl + K then → | Focus next group |
| ⌘/Ctrl + K then ← | Focus previous group |
Tabs
| Keys | Action |
|---|---|
| ⌘/Ctrl + 1–9 | Go to tab |
| ⌘/Ctrl + K then ] | Next tab |
| ⌘/Ctrl + K then [ | Previous tab |
| ⌘/Ctrl + K then W | Close tab |
| ⌘/Ctrl + K then Shift + W | Close all in group |
Go
| Keys | Action |
|---|---|
| ⌘/Ctrl + P | Go to page… |
| ? | Keyboard shortcuts |
The overlay also lists a Markup group — those keys belong to the page viewer, not to the workspace, and are covered in Files & the page viewer.
The full reference is Keyboard shortcuts.
Two-stroke shortcuts
Several editor and tab shortcuts are chords: you press ⌘/Ctrl + K, let go, then press a second key on its own. So Close tab is ⌘/Ctrl + K, release, W — not ⌘/Ctrl + K + W held together.
You have 1.5 seconds for the second stroke. After that the chord lapses and the key does whatever it normally does. Holding Shift or ⌘/Ctrl in between does not break the chord.
Shortcuts only work inside a project
None of these keys — ? included — do anything on the projects screen or the sign-in screen. They are registered by the workspace and exist only while a project is open.
Why a shortcut sometimes does nothing
- F, +, − and ? are ignored while you are typing in a text box. Combinations with ⌘/Ctrl still fire.
- Whatever is focused gets the key first. A focused 3D viewer, for example, can claim a key and the workspace shortcut will not run. Click elsewhere and try again.
- ⌘/Ctrl + 0 is not bound, and ⌘/Ctrl + 1–9 count tabs in the active group only — nothing happens if that group has fewer tabs.
- Both + and = zoom in; both − and _ zoom out, so you never need Shift.
Zoom a drawing, not the page
Hold ⌘/Ctrl and scroll — or pinch on a trackpad — to zoom the drawing. While a project is open, that gesture never zooms the browser page; the workspace takes it.
Browser zoom with ⌘/Ctrl + + / − on the keyboard still works as usual.
Move and resize any window
Every dialog and popup is a window you can move out of the way: confirmations, the push preview, the calculation report, a callout preview, a markup, a sheet card, and the feedback panel.
- Move it: drag its title bar.
- Resize it: drag any edge or corner. Each window has a smallest size, and no window can be dragged off the screen.
- Put it back: double-click the title bar. It returns to its usual place and size.
Fablnx remembers where you put each kind of window and how big you made it, on this computer, and opens it there next time. A popup that opens where you clicked (a callout preview, a markup, a sheet card) still opens where you clicked, at the size you last gave it. Make a callout preview bigger to see the detail bigger.
A long dialog scrolls inside itself, and its buttons stay in view at the bottom.
The empty editor
With no tab open, the pane reads Select or drag a page from the Explorer. — click any page in the Files panel, or drag one into the pane, to fill it. ("Explorer" in that message means the Files panel.)
The status bar
A single line runs across the bottom of the workspace: AI can make mistakes. Check what the copilot produces against the drawings. There is no connection indicator, save state or zoom level down here — every edit autosaves on its own.
If the project won't load
The workspace shows Couldn't load this project. and offers no retry button. Go Back to projects and open it again. See Troubleshooting.
Where to go next
- Read and mark up drawings in Files & the page viewer.
- Watch the copilot identify the steel and extract the spec.
- Start tracing in the scene editor.
- See the building take shape in Levels, Grids and the building.
- Look up any icon in the Icon glossary.